Electric Car Charger Installation at Home: Costs, Permits & Steps
Electric vehicles (EVs) are becoming more popular due to their environmental benefits and fuel savings. However, owning an EV comes with one major challenge—charging.
Public charging stations can be inconvenient, expensive, and time-consuming. Many EV owners find themselves searching for available chargers or waiting in line to power up their vehicles. A home EV charger installation solves this problem by allowing you to charge your car conveniently while you sleep or go about your day.
If you are considering electric car charger installation at home, you may have questions about costs, permits, and installation steps. This guide provides a detailed breakdown of everything you need to know to ensure a smooth car charger installation process.
Here are steps for electric car charger installation at home:
Step 1: Choose the Right EV Charger
Step 2: Evaluate Your Home’s Electrical Capacity
Step 3: Obtain the Necessary Permits
Step 4: Hire a Licensed Electrician
Step 5: Install the Charging Station
Step 6: Inspection and Final Testing
Why Home Charging is Essential for EV Owners
Most EVs come with a basic Level 1 charger, which plugs into a standard household outlet. While this might seem convenient, it has one major downside—charging is extremely slow. A Level 1 charger can take more than 24 hours to fully charge an electric vehicle, which is impractical for daily use.
Relying solely on public charging stations isn’t ideal either. These stations are not always available, and some charge high fees. Additionally, stopping at a charging station can disrupt your schedule, making long trips even longer.
By installing a home EV charger, you eliminate these inconveniences. With a Level 2 charger, your car can be fully charged in just a few hours. This means you can wake up to a fully charged vehicle every morning without worrying about finding a public charging station.
How Much Does an Electric Car Charger Installation Cost?
The total cost of electric car charger installation depends on several factors, including the type of charger, electrical system upgrades, and labor costs. Below is a detailed breakdown of what to expect.
1. Cost of the EV Charger
The first expense is the cost of the actual charger. EV chargers come in different types, with varying price points:
- Level 1 Charger (120V): Usually included with the vehicle, requiring no additional cost. However, charging times are significantly longer.
- Level 2 Charger (240V): Costs between $300 and $1,000, depending on the brand, amperage, and smart features. Level 2 chargers are highly recommended for home installations.
2. Installation Costs
The cost of electric car charger installation varies depending on your home’s existing electrical setup and whether upgrades are needed.
- Labor Costs: Hiring a licensed electrician costs between $500 and $1,500. If complex wiring is required, labor costs may be higher.
- Electrical Panel Upgrade: If your home’s panel cannot support the added electrical load, you may need an upgrade, which can cost $500-$2,500.
- Permits and Inspection Fees: Most cities require permits for electrical work, costing between $50 and $200.
- Additional Materials: Wires, circuit breakers, conduit, and other installation materials can add another $100-$500.
3. Total Estimated Cost
The total cost for a car charger installation typically falls between $1,000 and $3,000, depending on the factors mentioned above.
Do You Need Permits for EV Charger Installation?
Yes, most areas require permits for electric car charger installation. The permit ensures that your installation meets safety standards and that your home’s electrical system can handle the additional power load.
1. When is a Permit Required?
- When you are installing a Level 2 charger that requires a new 240V circuit.
- If electrical panel upgrades or rewiring are necessary.
- If local building codes require inspections for all electrical modifications.
2. How to Obtain a Permit
- Contact your local city or county building department to check permit requirements.
- Submit a permit application, which may include details about the charger model and installation location.
- Schedule an inspection after installation to ensure compliance with electrical codes.
Skipping the permit process could lead to legal issues, insurance problems, and potential hazards. Always confirm local regulations before proceeding with installation.
Step-by-Step Guide to Electric Car Charger Installation at Home
Although professional installation is recommended, understanding the process helps you prepare and make informed decisions. Below is a detailed step-by-step guide to ensure a smooth and efficient installation.
Step 1: Choose the Right EV Charger
Before starting the EV charger installation, it’s important to decide which type of charger best suits your needs.
- Level 1 Charger (120V): This type of charger comes with most electric vehicles and plugs into a standard household outlet. However, it has a very slow charging rate, often taking more than 24 hours to fully charge a vehicle.
- Level 2 Charger (240V): This charger requires a 240V outlet and can charge an electric vehicle much faster, typically within 4-8 hours, depending on the car’s battery capacity.
Most homeowners prefer Level 2 chargers due to their efficiency and convenience. While Level 1 chargers may be sufficient for occasional use, a Level 2 charger is a better long-term investment for daily driving.
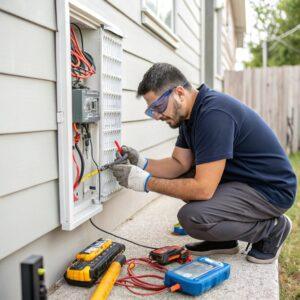
Step 2: Evaluate Your Home’s Electrical Capacity
Once you’ve chosen a charger, the next step is to check if your home’s electrical system can support the additional power load. Here’s what you need to consider:
- Check Your Electrical Panel: Determine if your panel has enough capacity to handle a 240V circuit. Most older homes may require an upgrade to accommodate the additional electrical load.
- Assess Existing Wiring: If your garage or driveway lacks the necessary wiring, new circuits may need to be installed.
- Hire a Professional for an Assessment: A licensed electrician can evaluate your electrical panel and suggest upgrades if necessary. If your panel is outdated, an upgrade could cost between $500 and $2,500, depending on the complexity of the work.
Step 3: Obtain the Necessary Permits
Most local governments require permits for electric car charger installation to ensure safety and compliance with building codes.
- Contact Your Local Authority: Check with your city or county to determine the specific permit requirements for your area.
- Submit a Permit Application: Depending on your location, you may need to provide details about the charger model, installation location, and any necessary electrical upgrades.
- Let Your Electrician Handle It: Many electricians can take care of the permit process for you, ensuring everything meets local regulations.
Skipping the permit process can lead to serious safety hazards and may result in penalties or insurance issues. Always confirm the legal requirements before proceeding.
Step 4: Hire a Licensed Electrician
For a safe and efficient electric car charger installation, hiring a licensed electrician is highly recommended.
- Ensure Proper Wiring and Connection: A professional electrician will handle the electrical wiring, ensuring the charger is properly connected to your electrical panel.
- Safety and Compliance: Licensed electricians follow safety codes and ensure that the installation meets national and local regulations.
- Request a Cost Estimate: The installation cost can vary, so it’s best to get an estimate upfront to avoid unexpected expenses.
Step 5: Install the Charging Station
Once all preparations are complete, the actual installation process begins.
- Run New Wiring: If necessary, the electrician will install a dedicated 240V circuit from your electrical panel to the charging location.
- Mount the Charger: The charging unit is securely attached to a wall or post in your garage or driveway for easy access.
- Set Up the Circuit Breaker: The electrician will install a circuit breaker that protects the charger from power surges or electrical faults.
Proper installation ensures that the charger operates efficiently and safely.
Step 6: Inspection and Final Testing
Before you start using your EV charger, final checks are necessary.
- City Inspection (If Required): Some areas require an official electrical inspection to verify that the installation complies with local codes.
- Electrician’s Final Test: The electrician will test the charger, ensuring that it is properly connected and functioning correctly.
- Check Charging Speed: Plug in your EV and confirm that the charger delivers the expected power level.
Once these steps are complete, your home EV charger is ready for daily use, providing you with a reliable and efficient charging solution.
How to Get the Most Out of Your Home EV Charger
To make the most of your electric vehicle (EV) charger installation, follow these essential tips:
1. Charge During Off-Peak Hours
Electricity rates often fluctuate throughout the day, with lower costs during off-peak hours. Many utility companies offer discounted rates at night, making overnight charging a cost-effective option. By setting your EV charger to operate during these hours, you can significantly reduce your electricity bill while ensuring your vehicle is fully charged and ready for the day ahead.
2. Use a Smart Charger
Investing in a smart charger can provide greater control and convenience. These chargers come with mobile apps that allow you to:
- Monitor the charging progress in real-time.
- Schedule charging sessions to align with off-peak hours.
- Track energy consumption and optimize efficiency.
Using a smart charger ensures you get the most out of your EV while maintaining lower energy costs.
3. Perform Regular Maintenance
To keep your EV charger in optimal condition:
- Regularly inspect the charging cable for dirt, debris, or damage.
- Check all connections to ensure they are secure and free from wear and tear.
- Follow the manufacturer’s maintenance recommendations to extend the lifespan of your charger and maintain charging efficiency.
By following these steps, you can ensure your home EV charger remains reliable, cost-efficient, and effective for years to come.
FAQs About Home EV Charger Installation
1. How long does electric car charger installation take?
Most electric car charger installations take 2-4 hours, but electrical panel upgrades can extend the process.
2. Can I install an EV charger myself?
It’s not recommended. EV charger installation involves high-voltage wiring, which should be handled by a licensed electrician for safety.
3. Will installing an EV charger increase my electricity bill?
Yes, but it is still cheaper than using public chargers. Charging during off-peak hours helps reduce costs.
4. Do all electric cars use the same charger?
Most EVs use the J1772 plug, except Tesla, which requires an adapter for non-Tesla chargers.
5. Can I take my EV charger with me if I move?
Yes, but you will need an electrician to safely remove and reinstall it at your new home.
Conclusion: The Best Way to Charge Your EV at Home
Installing a home EV charger offers convenience, cost savings, and the assurance that your vehicle is always charged and ready. By carefully planning the installation, obtaining the necessary permits, and hiring a qualified electrician, you can ensure a smooth and efficient setup. A properly installed charger enhances charging efficiency, reduces reliance on public stations, and provides long-term savings. With the right approach, the installation process is simple and enhances your overall electric vehicle experience.
Need professional EV charger installation? Contact NT Electrician today for reliable electric car charger installation. Get a free quote and charge your EV with ease!